How to Easily Recover Deleted Files on Windows and macOS
Have you ever accidentally deleted an important file and desperately needed to recover it? We've all been there. Luckily, there are ways to retrieve those deleted files, even if they've been overwritten. In this article, we'll explore the process of data recovery on both Windows and macOS operating systems.
Recovering Deleted or Overwritten Files
Let's start by creating a simple Excel file and then deleting it from both the desktop and the Recycle Bin. We'll then attempt to recover the Excel file and see how it goes.
Tip: Remember that pressing Shift+Delete permanently deletes a file without sending it to the Recycle Bin. Be sure you want to delete it before using this shortcut.

To begin the recovery process, open the Recoverit software from the Start menu or desktop shortcut. You'll see all the drives and common folders, such as the Desktop and Recycle Bin.

Now, let's proceed with the recovery steps:
1. Select the location or drive from which you want to recover the file. In our case, it's the Desktop.
Note: The Desktop is a default folder created inside the C drive where Windows is installed. You can also select the C Drive, but keep in mind that it will increase the scan time due to the drive's size.

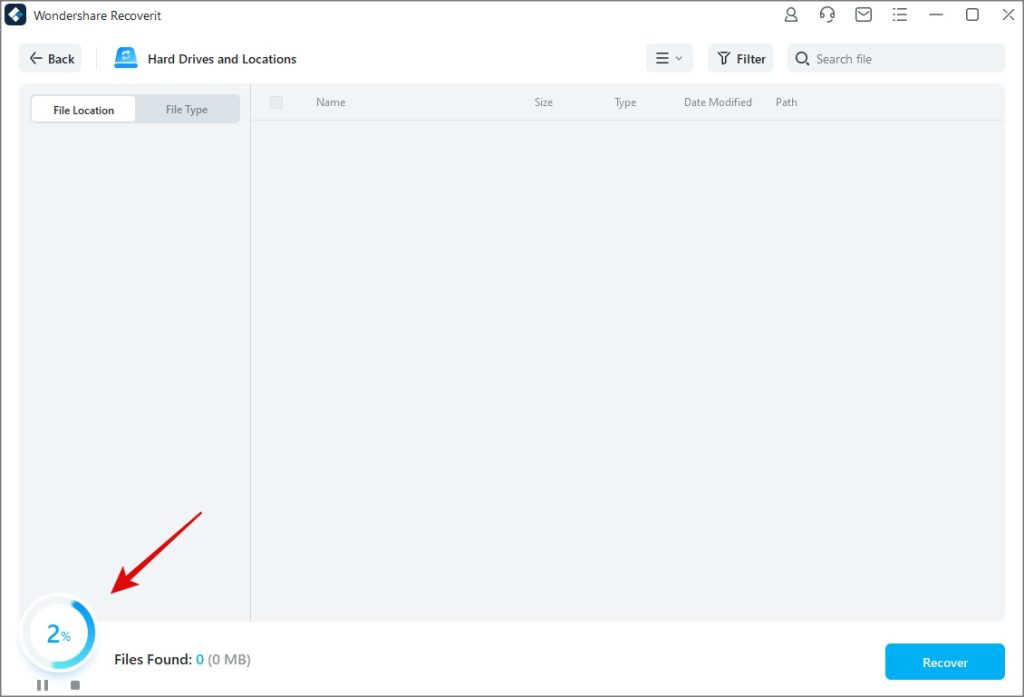
2. Selecting the drive or folder will initiate the scan immediately. You'll see a percentage icon at the bottom, indicating the progress. Wait until it reaches 100%.
3. Now you have three options to search for your file: by file location, file type, or using the search feature. The search function is the fastest way to find a specific file if you know its name. Click on the Search button, type the name, and hit Enter.

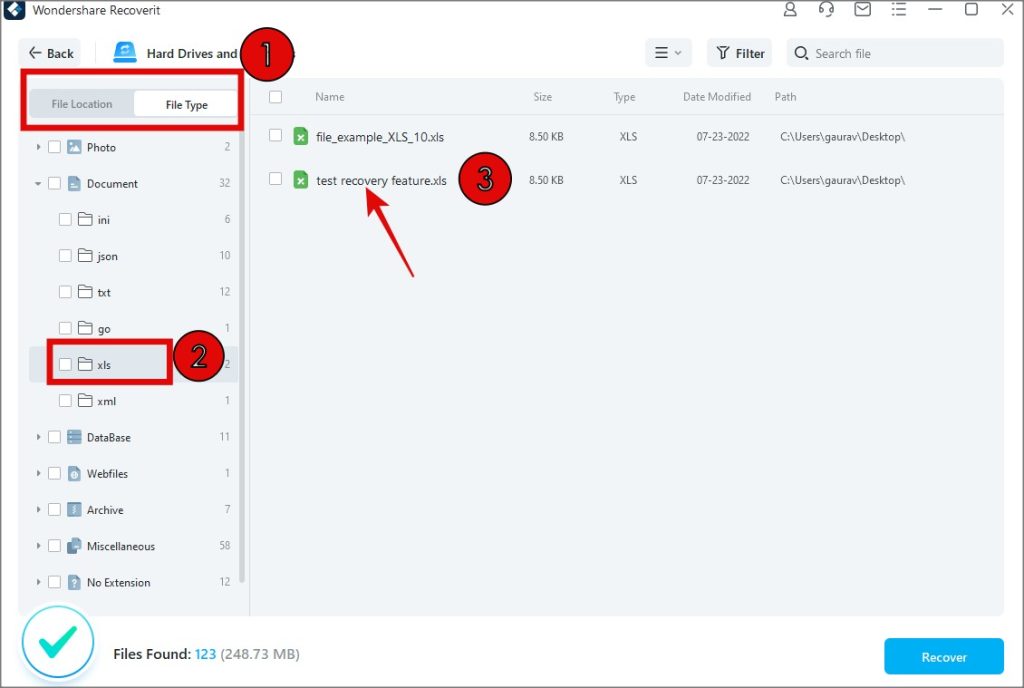
4. To search by file location, click on the File Location tab and navigate through the folder structure. You must remember or have a rough idea of where the file was stored. In the left sidebar, drill down the folder structure, and explore folders in the right sidebar.
Note: In the screenshot below, you'll see two Excel files. They are the same file, but we changed the name before deleting it. Recoverit detected both, meaning you can also recover previous versions of the same file if they were saved.

5. Click on the File Type tab to filter search results by the format of the file. Select the file type from the left sidebar and scroll through the results in the right sidebar.
6. Once you've filtered the search results, you can sort them by date, file size, and name. Select the file or files you want to recover and click on the Recover button at the bottom-right corner of the screen.

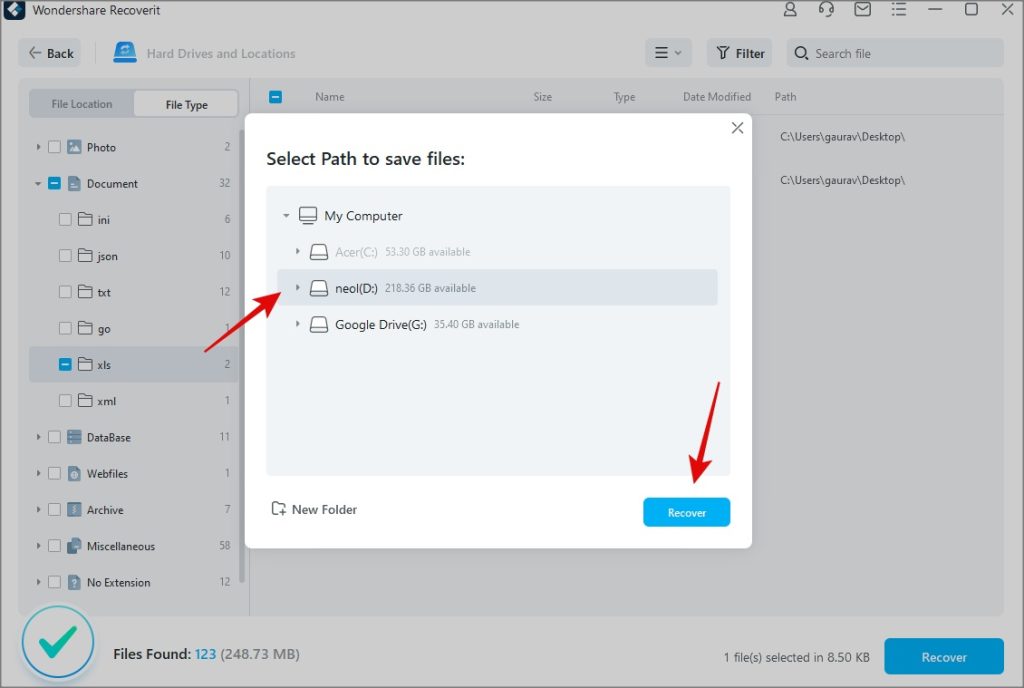
7. A pop-up will appear, asking you to choose a different location to save the recovered file. You cannot select the same drive where the file was previously saved. Click on Recover to proceed.
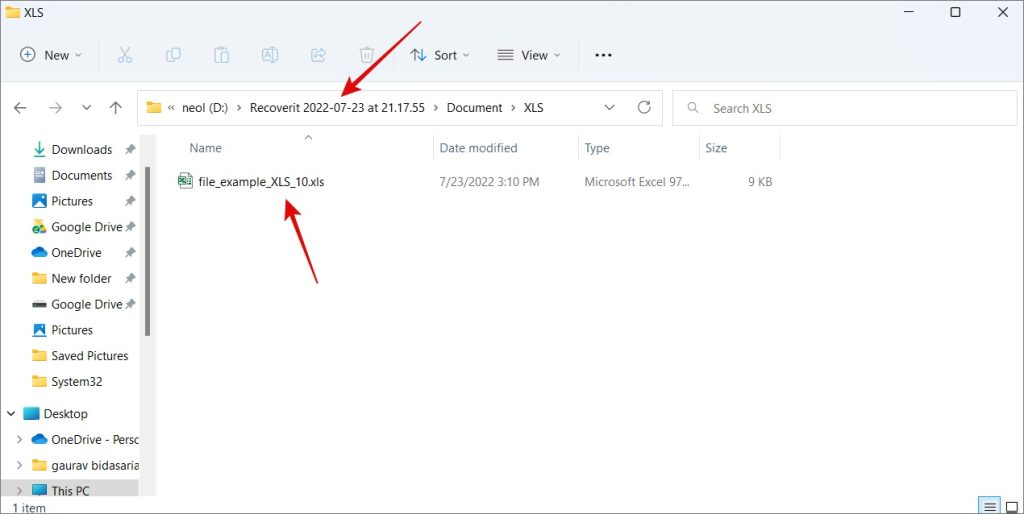
8. The file will be saved in the selected drive inside the Recoverit (date) folder. Recoverit will also create subfolders based on the file type, making it easier to manage recovered files.
Recoverit offers various filtering options to help you find the specific file you need. Sometimes, a simple search can return thousands of files, including temporary system files that are essential for the proper functioning of the Windows ecosystem. The ability to filter search results becomes even more crucial in such cases.
Is It Worth It?
Recoverit is the kind of app you only need when disaster strikes and you need to recover long-deleted files. However, it works like a charm and can retrieve all sorts of deleted files and folders from your computer. With plenty of filtering options available, you can efficiently search for and recover the files you need.

Jim's passion for Apple products ignited in 2007 when Steve Jobs introduced the first iPhone. This was a canon event in his life. Noticing a lack of iPad-focused content that is easy to understand even for “tech-noob”, he decided to create Tabletmonkeys in 2011.
Jim continues to share his expertise and passion for tablets, helping his audience as much as he can with his motto “One Swipe at a Time!”