How to Easily Remove Background in Paint and Paint 3D
If you've ever tried using free background remover tools, you know the frustration of dealing with watermarks, reduced image resolution, or having to provide your email ID to download the image. But fear not! Microsoft has come to the rescue with a background removal tool in the Paint app for Windows 11. In this article, we'll show you how to remove backgrounds from images using both Paint and Paint 3D.
Make the Image Background Transparent in Paint
Removing the background from a photo in the Paint app is as simple as swiping right on Tinder. Just follow these steps:
-
Launch the Paint app on your Windows computer. If you don't have it, you can download it from the Microsoft Store.

-
Click on the File tab and select the Open option.

-
Select the image you want to make transparent and click the Open button.

-
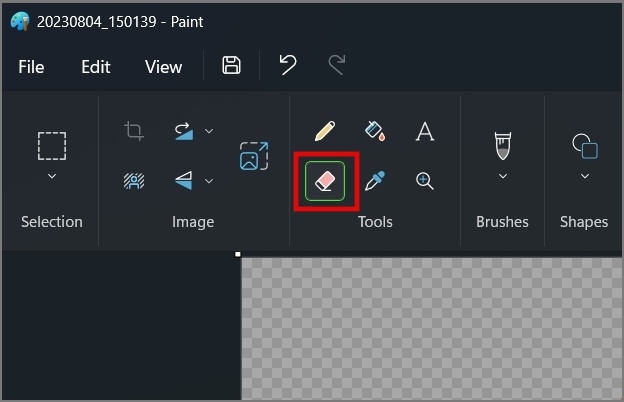
Hit the Remove Background button (Person icon with shaded line) inside the Image section and let it analyze the image.

After a few seconds, your image will turn transparent. You can check the before and after samples to see the results.
-
If the tool misses any part, you can use the Eraser tool to make a specific part of the image background transparent.
-
Once you're satisfied with the result, save the image by clicking on the File tab > Save as, and select the PNG picture option to save the image with a transparent background.

-
Choose the location to save the image and hit the Save button.
The Paint app also performs well in removing backgrounds from outdoor night shots without degrading image resolution or quality.
Make the Image Background Transparent in Paint 3D
In 2017, Windows 10 introduced the Paint 3D app, an updated version of the classic Paint app that also included a background remover feature. Here's how to use it:
-
Launch the Paint 3D app or download it if you haven't already.
-
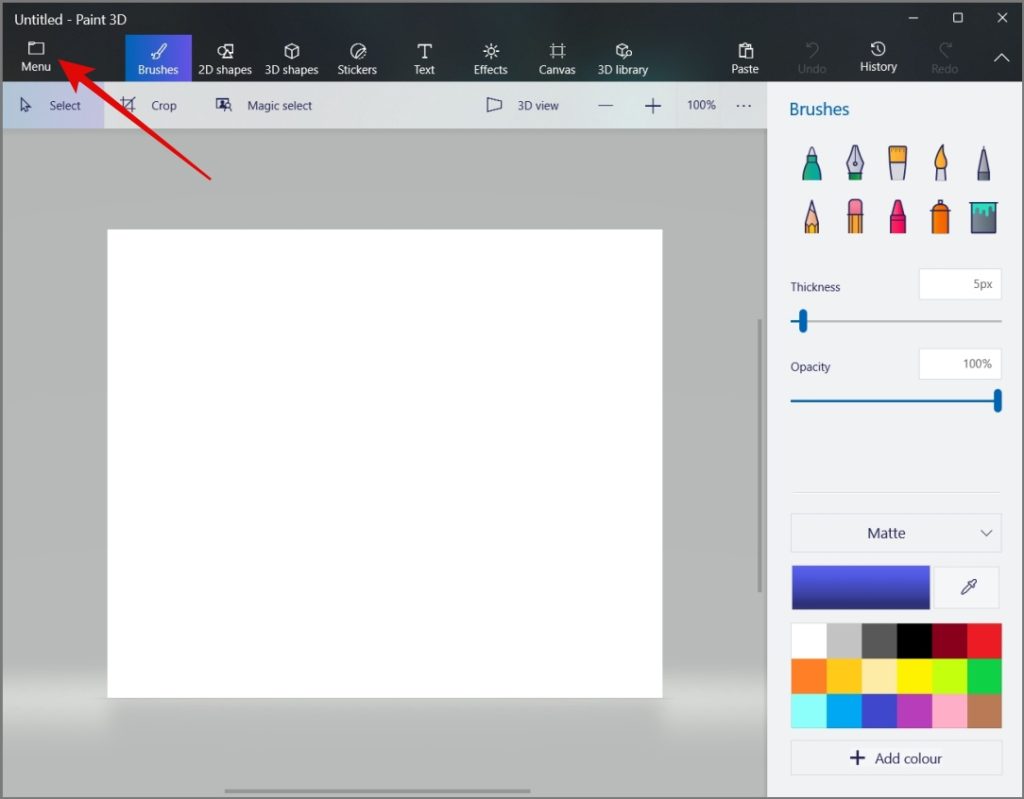
Once the app is open, click on the Menu tab.
-
Click on the Open menu and select the Browse files button.

-
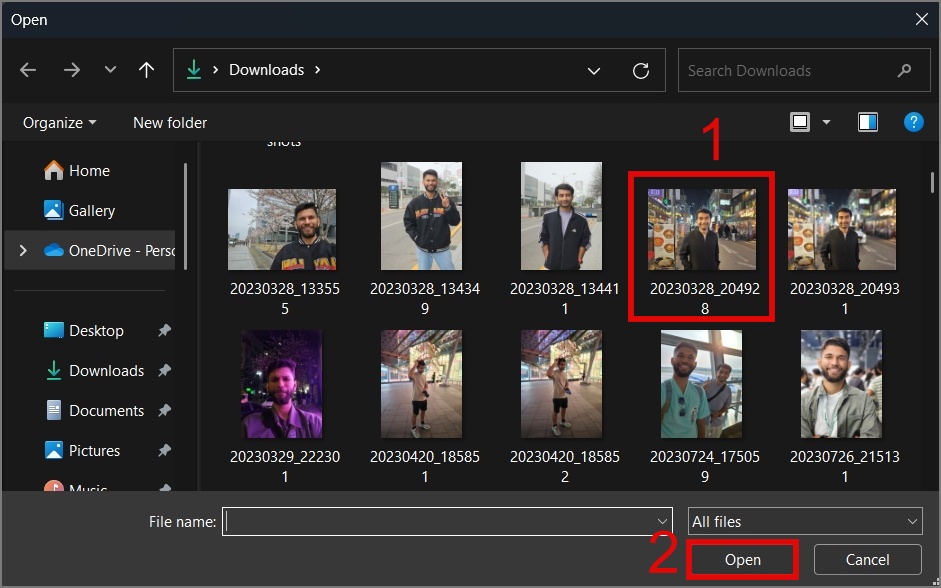
Select the image you want to edit and hit the Open button.
-
Once your image is loaded, click on the Magic Select tool in the top bar.

-
Move the outline closer to the subject for better edge detection. Then hit Next and the app will automatically detect the subject based on your outline.

-
If it misses any part, use the Add or Remove buttons to fine-tune the selection. Once you're satisfied, click Done.
-
Switch to the Canvas tab and disable the Show canvas toggle.

-
Go to the Menu and select the ‘Save as' option. Choose the Image file format.
-
Select the PNG file format from the drop-down menu, customize the image resolution, enable Transparency, and click Save.

-
Choose the location to save your transparent image and click Save.
Compared to the classic Paint app, Paint 3D falls short in detecting edges and involves a more complicated process to make a photo transparent. Stick with the good old Paint app for better reliability.
FAQs
- Which one is the best background remover app, Paint or Paint 3D?
We ran several tests and found that the regular Paint app is better than Paint 3D. It's easier to erase backgrounds in the classic Paint app and it does a better job detecting edges.
With the background remover tools in Paint and Paint 3D, you can now make your background disappear like a ninja. Say goodbye to low-quality images and watermarks. For more information on removing backgrounds from images on Android and iPhone, check out our other articles.

Jim's passion for Apple products ignited in 2007 when Steve Jobs introduced the first iPhone. This was a canon event in his life. Noticing a lack of iPad-focused content that is easy to understand even for “tech-noob”, he decided to create Tabletmonkeys in 2011.
Jim continues to share his expertise and passion for tablets, helping his audience as much as he can with his motto “One Swipe at a Time!”