How To Do Multicam Editing (2024 Tutorial)
If you’re juggling multiple camera angles or scenes in one project, multicam editing is the solution. It lets you sync, view, and switch between shots effortlessly, a game-changer for smoother video production. Think of a live event with different camera views — handling that footage without the right software can get overwhelming.
Filmora multicam editing simplifies this process, even if you’re new to this type of editing. In this article, you’ll learn the multicam editing workflow and how to shoot multicam video sequences.

Part 1. Wondershare Filmora: Best Software for Multicam Video Editing
Part 2. How To Edit Multicam Videos in Filmora
Part 3. How To Shoot Dynamic Multicam Video Sequences
Part 4. How To Use Multicam Editing for Different Types of Projects
Part 1. Wondershare Filmora: Best Software for Multicam Video Editing
Creating polished and professional-looking multi-angle videos can be challenging. But if you are new to it, Wondershare Filmora simplifies multicam video editing, making it accessible even for beginners.
This software is packed with professional tools that make syncing clips from different cameras easy and fast. Now, you have more time to focus on the story you want to tell.
If you’re just starting, here’s why Filmora is one of the best choices for it:
- Multiple Ways To Sync. Filmora aligns clips from different cameras using audio, first frame, or first marker. It allows you to sync camera shots automatically and avoid manual adjustments.
- Real-Time Switch Between Camera Angles. Preview different angles live and switch between them as you edit. You get a clear view of each shot and can make video cuts with confidence.
- Multi-Camera Audio Angle. Need to switch audio from different camera clips? Filmora makes it simple to select the best audio track for each part of your project.
Filmora offers more features to enhance your project if you’re finished with multicam editingmulticam editing. Try its AI tools, like video denoising and music generation. Or add creative touches with split screens, speed ramping, effects, or stickers. With these features, Filmora gives you both control and creative freedom to make videos that stand out.
Part 2. How To Edit Multicam Videos in Filmora
Follow this guide to create multicam sequences from various camera sources:
Step 1: After downloading Filmora, create or log in to your account.
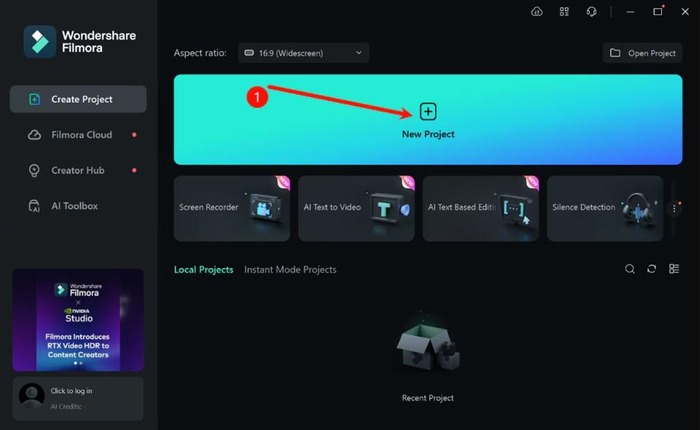
Step 2: Open Filmora and create a New Project.
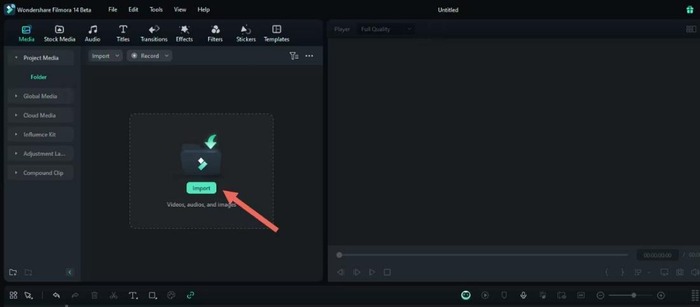
Step 3: Click Import to add all your videos to the Project Media library. This includes all the different angles you want to edit together.
Step 4: There are two ways to create multicam clips:
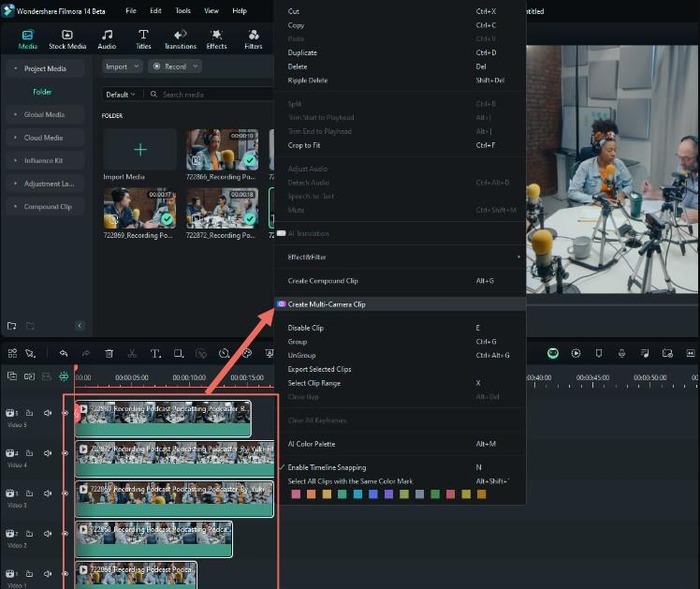
- Method 1: Select all imported media files from the library. Next, right-click and choose Create Multi-Camera Clip from the context menu.

- Method 2: Drag each video clip onto the editing timeline in different video tracks. Select all videos in the editing timeline, right-click, and then choose Create Multi-Camera Clip in the menu.
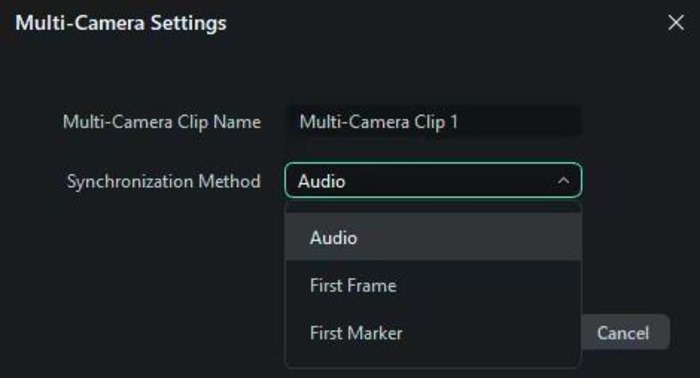
Step 5: From the pop-up window, enter the Multi-Camera Clip Name. Then, select a Synchronization Method from the dropdown list.
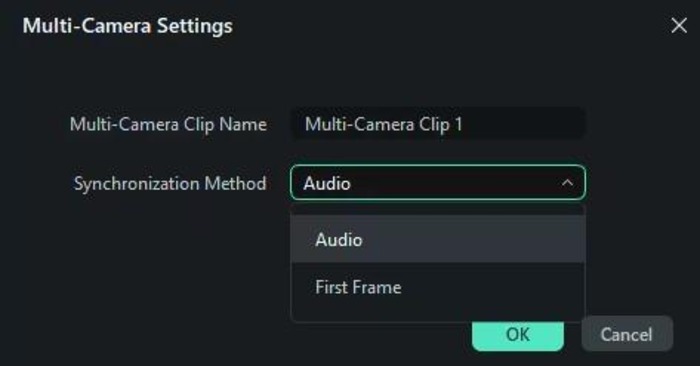
Note: There are two synchronization methods for multi-camera clips from the media library. When creating from the editing timeline, you’ll have three options.
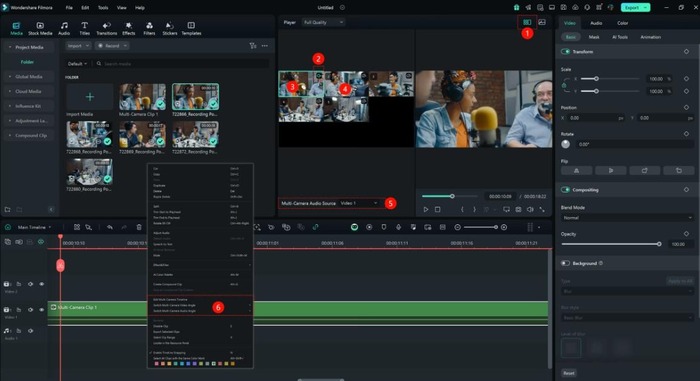
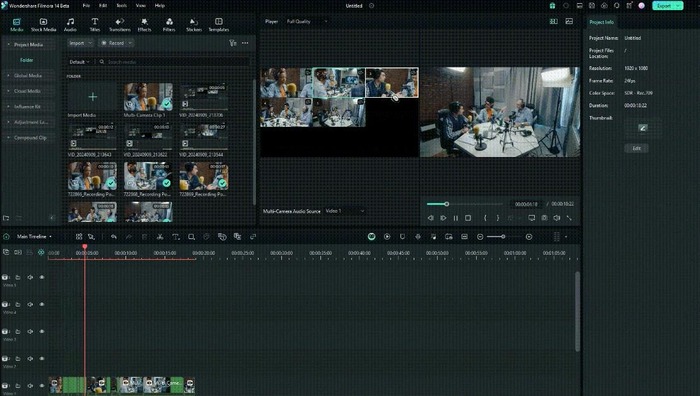
Step 6: In the Player section, click the Switch Multi-Camera View icon. You’ll simultaneously see each of your camera angles in different sections.
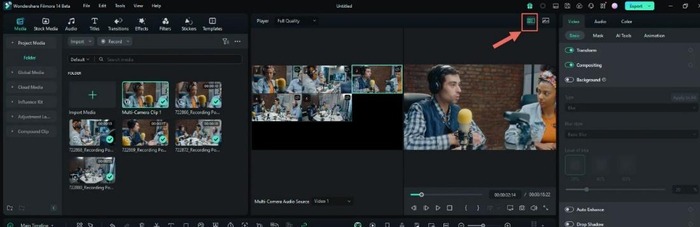
Step 7: As the video plays, click the camera angle you want to display. Filmora will record each cut as you switch between angles.
Part 3. How To Shoot Dynamic Multicam Video Sequences
To create engaging videos with a professional feel, you should first know how to shoot multicam video sequences.
These techniques add depth and emphasize crucial moments. Each camera shot sequence style brings something unique to your storytelling. Below are some popular techniques to help you create nice cinematic sequences in your projects.
Reaction Shot Sequence
Capture your subject’s facial expressions or reactions to add emotion. Reaction shots can bring life to your story by highlighting how characters feel in the moment.
Over-the-Shoulder Shot Sequence
Use this sequence in conversations or confrontational scenes. Filming over one subject’s shoulder makes the viewer feel involved in the exchange, which creates a more immersive experience.
Cutaway Shot Sequence
Insert shots of secondary elements, like props or background details, to break up the main action. Cutaways are great for adding visual variety and can help with smooth transitions.
Action Shot Sequence
Use this sequence to capture fast-moving scenes or physical activity. Multiple camera angles keep the action dynamic, which works well for sports or intense movement.
Establishing Shot Sequence
Start with a wide shot to set the scene and provide context for the location and mood. This sequence introduces viewers to the setting before zooming in on the action.
Point-of-View (POV) Shot Sequence
Show the scene from a character’s perspective. This approach adds a personal touch and lets viewers feel as though they’re seeing things through the character’s eyes.
Parallel Shot Sequence
Switch between scenes happening at the same time but in different places. This technique builds suspense and shows how events are interconnected, which gives the story a layered feel.
Applying these techniques can make your multicam editing projects far more engaging. Plus, they help you tell stories that keep viewers hooked from start to finish.
Part 4. How To Use Multicam Editing for Different Types of Projects
Using multicam editing allows you to create engaging videos with different perspectives. Check out these examples below:
Interviews and Panels
For interviews, switching between cameras can add variety and emphasize vital moments, creating a natural flow. Here’s how to set it up:
- Primary Angle. Use a centered, medium shot on the main speaker. This angle will be the primary focus when they’re speaking directly to the audience.
- Secondary Angle. Position a camera at a slight angle for a more candid view of the speaker. It can give viewers a different perspective and make the conversation more natural.
- Reaction Shots. Add a camera focused on the other person (or people) in the conversation to capture their reactions. Alternating between speakers and reactions keeps the video dynamic and engaging.
Event Coverage
Events like concerts, conferences, or ceremonies often have various points of interest. Multicam editing is essential here to capture the main stage and audience reactions.
- Wide Shot of the Stage. Set up a camera for a wide shot of the main stage to give viewers a complete view of the event.
- Close-Ups on Speakers or Performers. Use a secondary camera to capture close-ups of speakers or performers. This angle highlights emotions and body language.
- Audience Shots. Include a camera dedicated to audience reactions. Switching between the stage and the audience brings viewers into the experience.
Tutorials or Product Demo Videos
Multicam editing is also useful for creating engaging tutorials or product demo videos. It allows you to show both the instructor and detailed close-ups of the process.
- Main Angle on the Instructor. Use a medium shot that captures the instructor or presenter as they speak to the audience. It keeps the video personal and connects the audience with the speaker.
- Close-Up of the Product or Task. Place a secondary camera at a close angle focused on the product or task being demonstrated. For example, if it’s a cooking tutorial, this camera could capture the hands while chopping ingredients.
- Over-the-Shoulder Angle. An over-the-shoulder angle can add perspective, showing what the instructor sees and making the demonstration more relatable for viewers.
Conclusion
Multicam editing can elevate your video projects by adding variety and depth. This article covers how to edit, shoot, and apply multicam techniques in different projects.
Filmora multicam editing software makes it easier to sync clips, switch angles, and create engaging content. After learning how to shoot and create multi-camera sequences, it’s your turn to put these skills to work. Try Filmora and use it in your next projects.

Jim’s passion for Apple products ignited in 2007 when Steve Jobs introduced the first iPhone. This was a canon event in his life. Noticing a lack of iPad-focused content that is easy to understand even for “tech-noob”, he decided to create Tabletmonkeys in 2011.
Jim continues to share his expertise and passion for tablets, helping his audience as much as he can with his motto “One Swipe at a Time!”